


Enrolling workers into NEST
In this section

How do I create an enrolment file using Nest templates?
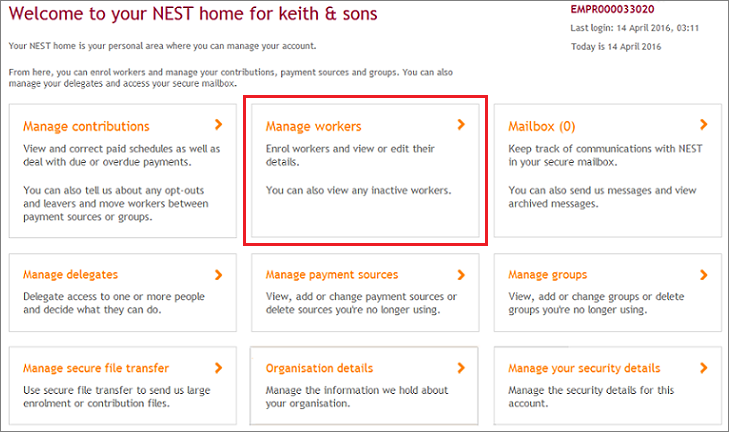
Once you’re ready to enrol your workers, log in to your Nest account where you can find your employer Nest ID in the top right corner. It’s a good idea to copy this so you can paste it in your enrolment file later.
Then, on the home page, select ‘Manage workers’ to go to the area where you can enrol new workers as well as view and edit information for existing workers.
Under ‘Total workers saving with Nest’, select ‘file upload’.
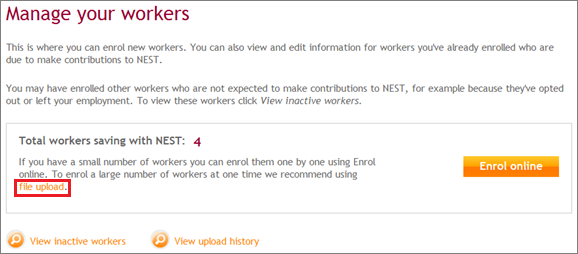
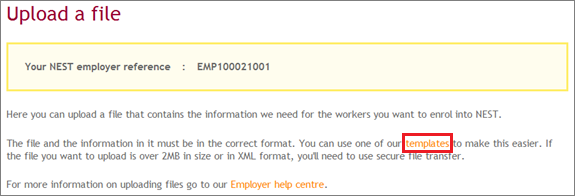
If you don’t have a template ready, select ‘templates’ to use one of ours.
If you’re using a third-party payroll provider, they may create the file for you. For more information, read 'What should I do if my payroll provider has created an enrolment file for me?'.
This will take you to an Excel template with 4 tabs at the bottom. The ‘Read Me’ tab explains in detail how to complete the CSV file.
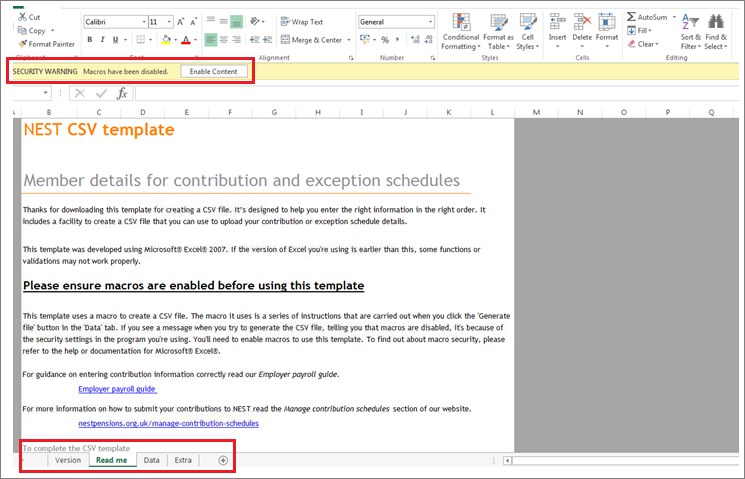
Once you’ve read through it, go to the ‘Data’ tab to enter your workers’ information.
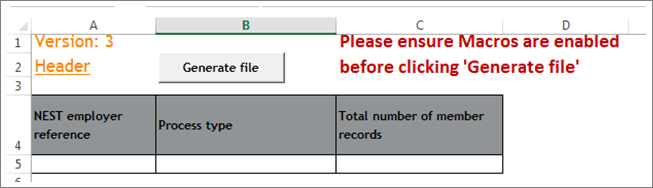
You’ll need to make sure you’ve enabled the macros in the Excel file – the way to do this will depend on your computer and its security settings. Generally, a ‘Security Warning’ banner will pop up at the top of the page, where you can select ‘Enable Content’ to enable the macros.

Tips on how to enter the information:
Below cells A4, B4 and C4 in grey you’ll need to fill in the following information:
- Nest employer reference: this is your Nest employer ID, and it starts with EMP. If you copied it from the ‘Manage workers’ page earlier, you can paste it into the cell.
- Process type: you should select ME for Member Enrolment.
- Total number of member records: you can leave this cell empty until you’ve finished adding your workers.
Your workers’ personal details
Once you’ve informed your workers that you’re enrolling them, you’ll need their following information:
- name
- date of birth
- National Insurance (NI) number
- contact information - address and personal email if available
- alternative identifier - only needed if NI number isn’t available
- the name of the Nest group you’re enrolling them into
- the name of the Nest payment source you’ll use to pay their contributions
- their enrolment type
- their start date – this is the date your worker’s enrolment is effective, which is usually your staging date
Entering information
Next, you’ll find that the cells in row 9 are all grey and columns A to X contain the headings for the information you’ll need.
Make sure to type each worker’s personal details carefully – it may be easier to copy and paste the information from another file. For more detailed guidance, read our 'Employer Payroll Guide (PDF)'.
Here’s what you need to know:
- Dropdown menus: you’ll need to select the cell to make this option appear on the right-hand side of the cell. If there’s a dropdown menu, you won’t be able to enter free text.
- Using specific formats: you may need to enter numbers in a specific format, which we show at the top of the column. For example, the worker’s date of birth must follow this format: YYYY-MM-DD. If the worker’s date of birth is 20th April 1984, you’d enter 1984-04-20. Excel will usually reformat the numbers automatically if you don’t follow this format. If this doesn’t happen, you can format the cells yourself.
- NI numbers: don’t include any spaces.
- Worker’s address: you’ll need the worker’s full address, as we don’t offer a system for you to search for it.
- Email address: this means we can send the worker a welcome email and allows us to keep in touch with them.
Group and payment source
You’ll need to enter the name of the ‘Group and Payment source’ for the worker in columns U and V – you chose these names when you set up your account. If you have more than one payment source or group, check you’re enrolling your workers into the correct one.
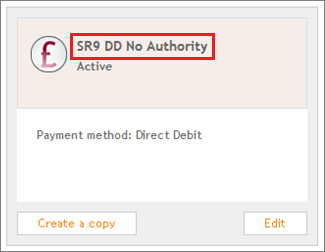
If you’ve forgotten the names, you can find them on your home page under ‘Manage payment sources’ and ‘Manage groups’. They’ll be at the top of the grey boxes – make sure you type these into the cells exactly as they appear in your account.
For example, this payment source is called ‘SR9 DD No Authority’:
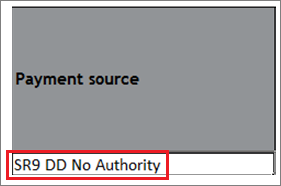
This is the name you’d need to type or copy and paste in your enrolment file, like this:
Once you’ve added all your workers to the file, make sure you’ve filled in the number of members you’re enrolling under ‘Total number of member records’.
Finally, check you’ve entered all the correct details and then select ‘Generate file’ at the top of column B. This will highlight anything important or any errors so you can correct them straight away. We’ll explain how to correct any errors in the file, but if you need more information, read our 'Fixing errors' guide.
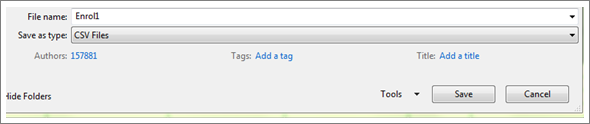
If your file is ready, when you select ‘Generate file’, you’ll have the option to save it to your desktop or another location.
The file will save as a CSV rather than an Excel file – this is the version you’ll need to upload.
We value your feedback
Your feedback is important to us. To help us improve, tell us what you think about our employer help centre by taking a short survey.
Was this helpful to you?
Thank you.


 Live chat
Thank you.
Thank you for the feedback.
Feedback
Was this helpful to you?
Live Chat
Our live help agents will answer your questions and guide you through setting up and managing NEST.
Our chat is available from Monday to Sunday from 8.00AM to 8.00PM
Web chat is currently unavailable
We're open from 10.00 am until 4.00 pm today. Please try again between these hours or our usual business hours of 8am to 8pm Monday to Sunday. Or you can visit our online help centre.
Web chat is currently unavailable
Our offices are now closed for the Bank Holiday. You can reach us during our normal opening times of 8am to 8pm Monday to Sunday. Or you can visit our online help centre.
Welcome to live help
To help us deal with your question quickly please tell us who you are and what you'd like help with by choosing an option from each of the menus below: